Setting up CI/CD for free

Building a free CI/CD pipeline using AWS S3 and CircleCI
CI/CD can speed up the process of updating websites. If you’re going to be working on a website over the course of days, months and even years, you will spend a lot of time deploying changes you’ve made. This is where a CI/CD pipeline comes in. Push up changes to your GitHub and boom, those changes will be automatically deployed. No logging into and manually uploading your files to wherever they’re being hosted from.
This guide we will utilize a services.
- AWS S3
- GitHub
- CircleCI
Setting up S3 bucket for static hosting
Head on over to the AWS Console. Search for the S3 service and hit create a new bucket. The bucket name should be the same as whatever domain, so if you owned the Google domain you would name it “google.com”, and take a note of the region.
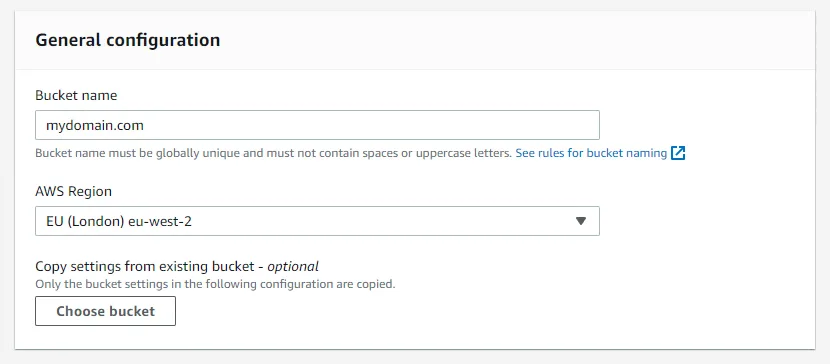
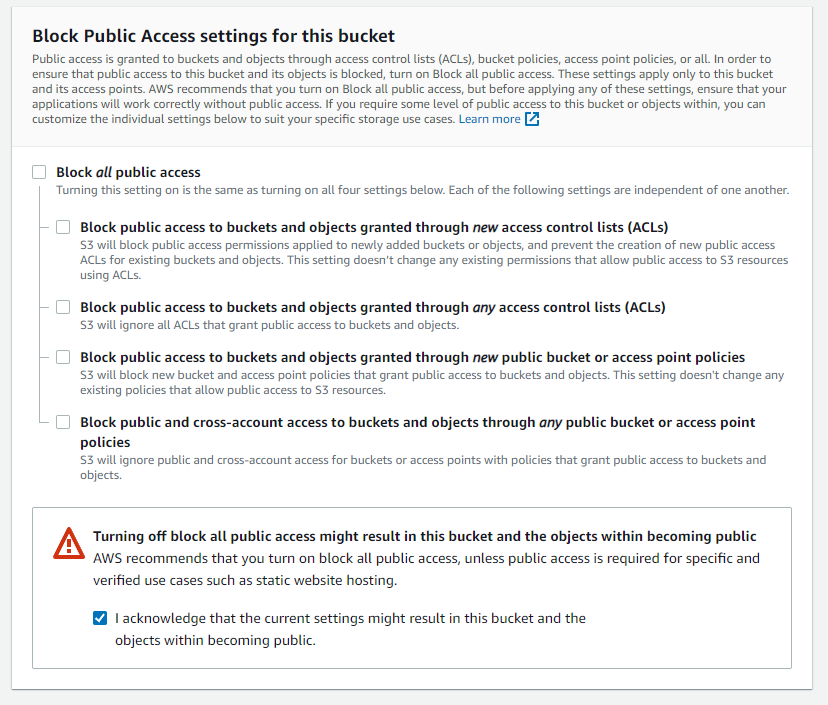
Logically the region should be close to wherever the majority of users of your website are from to give a slightly better performance. You will also want to allow public access otherwise no one will be able to access your website:
Setting up IAM User
While we have the AWS console open, let’s head on over to IAM (Identify and Access Management). We will want to give our CircleCI access to our S3 bucket so it can deploy our code to it later on down the line.
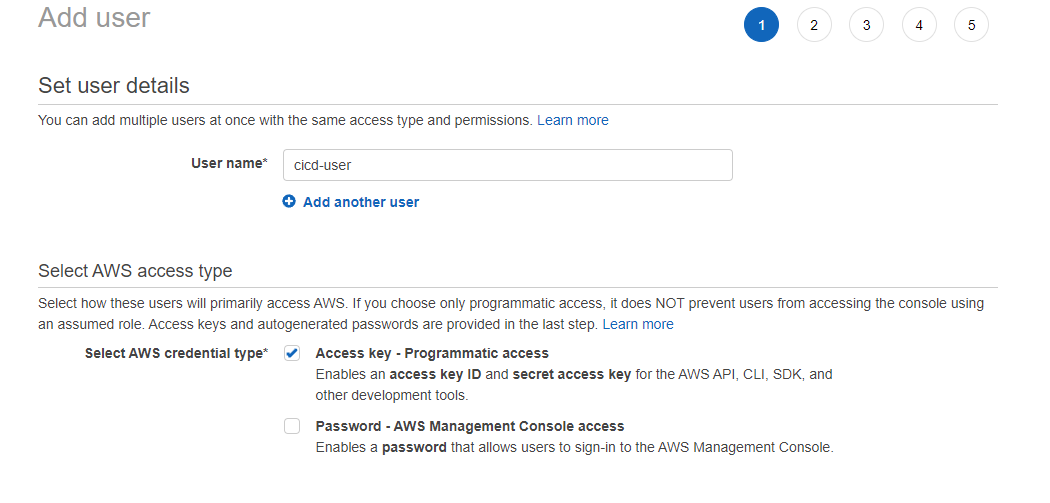
Once in the IAM service, click on Users and then press the “Add Users” button. Give your user a name then make sure you select “Access key” for it’s access type, this gives this user access to perform actions using the AWS CLI but not console access.
Now we want to add the S3 permissions to this user, you can write the policy yourself but to make things quicker and easier head on over to “Attach existing policies directly” and search for S3, I selected “AmazonS3FullAccess” to ensure they had the necessary permissions to do the job.
Go through the rest of the create user Wizard and when you have added the user make sure to save the “Access Key ID” and “Secret access key” somewhere safe. I like to use LastPass to store my passwords as it works across all devices.
Commit code to GitHub
If for whatever reason your code isn’t on GitHub, create a repo and get it up on there.
Set-up CircleCI account
Open up CircleCI and create an account, I reccomend signing up using your GitHub accoutn as you’re going to link it to your CircleCI account anyways. Once you’re in and have your GitHub account connected, you should be able to see your Repos. Click the “Set Up Project” button next to the repo you want to make a CI/CD pipeline for.
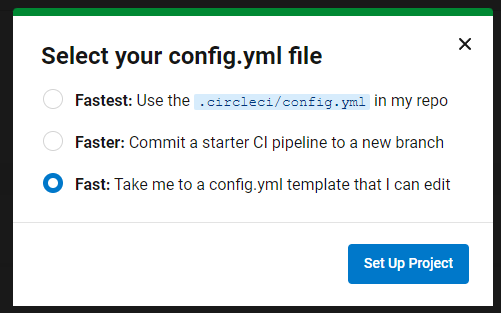
Choose Fast and then on the next screen select “Hello World”, and just get through the rest of the initial start up by selecting “Use Existing Config” then “Start Building” as we now want to get into our Repo code and will start creating a config file to handle the CI pipeline.
Adding .circleci config to your project
At the top level directory, create a new folder called .circleci and in that folder a file called config.yml. In here you will want to add the following code:
version: 2.1
orbs:
  aws-s3: circleci/aws-s3@1.0.6
description: |
  copy files to S3 bucket and then create an Cloudfront invalidation
  on the distribution.

jobs:
  build:
    docker:
      - image: 'circleci/python:latest'

    steps:
      - checkout
      - aws-s3/sync:
          from: out
          to: 's3://example.com'
          arguments: |
            --acl public-read \

            --cache-control "max-age=86400" \

            --exclude ".git/*" \

            --exclude ".gitignore" \

            --exclude ".circleci/*" \

          overwrite: true
Swap out the following:
- To s3://example.com’to be s3://yourbucketname
- from: . should be updated to the folder that holds the files you want to serve are such as dist, build, out etc.
Something to note, if you want to move across all the files in your repo to S3, swap out from: out with from: .
Push up those changes and watch the pipeline build on CircleCI! If all is well, then you should see the build go green
Debugging your pipeline
Before successfully getting my pipeline up and running, I ran into a couple of errors, just in-case you hit the same ones I’ll go through the error and my solution.
usage: aws s3 sync {'<LocalPath>'} {'<S3Uri>'} or {'<S3Uri>'}{' '} {'<LocalPath>'} or {'<S3Uri>'} {'<S3Uri>'} Error: Invalid argument type
I had to update the to: ‘s3://your-bucket’ to match my bucket name, before I was putting in the actual S3 bucket URL.
The user-provided path ./out/* does not exist. Exited with code exit status 255
I had to change two things in my repo for this one, first of all out was being excluded as it was included in the .gitignore file.
And the path for the folder just needed to be the folder name out without the ./folderName/*
A quick aside, sometimes you just want to commit your work up and not actually deploy said code to your server. To do this, in your commit message just add the following [ci skip]. For example $ git commit -m "Chore: Just making a tiny adjustment, don't want to deploy this [ci skip]
I hope this was helpful and you managed to deploy a pipeline, if you have an issues please, get in touch, and I will do what I can to help.